My first REACTIVO installation – Tester review
Hello Reactivo fans,
In this blog, I am going to describe how was my first Reactivo installation in the real world, and what are my tips and throughs about the product.
First of all, I was a beta tester of the REACTIVO lighting, so we expected some issues that can appear during the first testing. I am working in the sales department, so I don´t have any special technical skills that I could use, just common sense like everybody else.
Let´s start with the installation
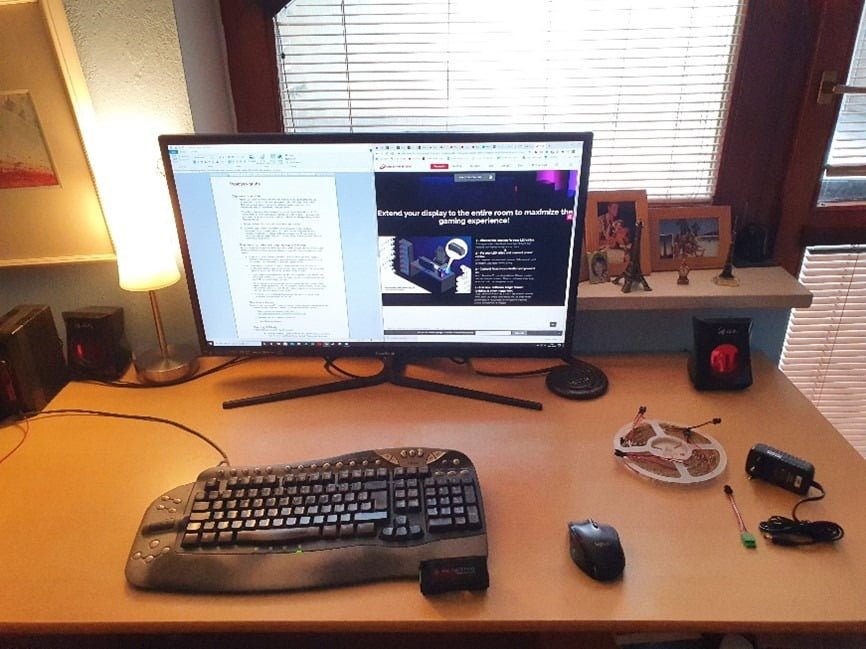
have received in my office the same package as you would buy in “Single pack” – it means one Reactivo device with 1, 5 meters of LED strip, adapter, and manual. I was really curious about the effect of what it will do and the whole atmosphere that it will create in my room. When I came home and started to think, where I will install LED strips and how to install them without any experience from the past.
First, I needed to think about which material is suited for strips installation with 3M tape and which are not. Walls are not recommended I can tell you now ?. When I figure out, where I will install LED strips.
When the hardware was connected correctly, I could start with software installation. It was very simple, just download it from the web and install. It´s just a few steps and everything went as expected. After I needed to connect with Reactivo to our home WIFI.
After a few minutes, I have realized that I need to use mobile WIFI for that. I was able to connect to the web, what was already a good sign but still, something was not working …. Again, I was thinking about where can be the problem and how to solve it. In my home, I have two WIFI adapters. One is from UPC (original from the provider) and the second is from 3rd party – Asus adapter. I got 2 different ones because Asus has a much stronger WIFI signal and I am using this one but my desktop Pc is connected via ethernet to the original UCP one.

I chose the provider router for Reactivo, wrote the password, and finally I was connected. I grabbed the screen in settings, draw my simple installation on how it looks in reality, and gave information on how many strips I got. I have tried to play some videos on YouTube but realized some color on LED strips are different that should be on the video. I came back to the settings and set up my RGB installation on Reactivo web configuration (accessible from software). This wouldn´t happen to you because we will send you correct settings to your strips but it´s very useful in case you have strips from 3rd party (as you would buy from AliExpress or Amazon).


TIP 1: Play some video on YouTube, where colors are changing automatically, and double-check if your strips have the same colors, if not change the order of colors in web configuration (settings).
TIP 2: Set up Reactivo contrast to at least 60 or more when everything is working properly, you will get much better effects.
The most important question – Is the atmosphere from Reactivo worth it?
For me definitely yes, I got three reasons. The first one is the installation customization of LED strips anywhere in your room. You are not limited of your PC monitor, where the majority of people install them, but it can be your table, cabinet, or shelf. I am using my Pc to watch everything on YouTube, Netflix, Disney+, HBO Max very often and Reactivo give me better-watching experience and added up the atmosphere that is extraordinary but this is not all. Reactivo is made primary for maximizing experience from gaming and this is where the magic happens. I tried to play games like Dota II, Total War: Warhammer II, Total War: Troy, Hitman 47, Tomb Raider, GTA San Andreas, and Witcher and really RPG games like Witcher is amazing. Reactivo easily manages fast colors changing on the monitor and LED strips are making a fantastic job to do so, without any delay.
PROS
- Display grabbing function
- Making a cool atmosphere in your room
- Easy to install (Plug and play system)
- Cheap intuitive decoration made by LED strips up to 3 meters
- Low electricity consumption
- No delay between PC monitor / LED strips
CONS
- Basic software design /GUI
- Limit 3 meters of LED strips without additional power supply in case of 100% brightness (you will use a maximum of 50%, it´s mean you can connect another 6 meters of LED strip)